Quickstart
Quickstart guide on getting started with WemX, the minimum server requirements, installation and more.
Introduction
WemX is Laravel based billing automation software designed to be modern, scalable and flexible for businesses that sell digital products such as software, game servers, machine servers and online products.
Discord
Our Discord community is the best place to get support
GitHub
View the project on GitHub
Marketplace
Browse through community made extensions
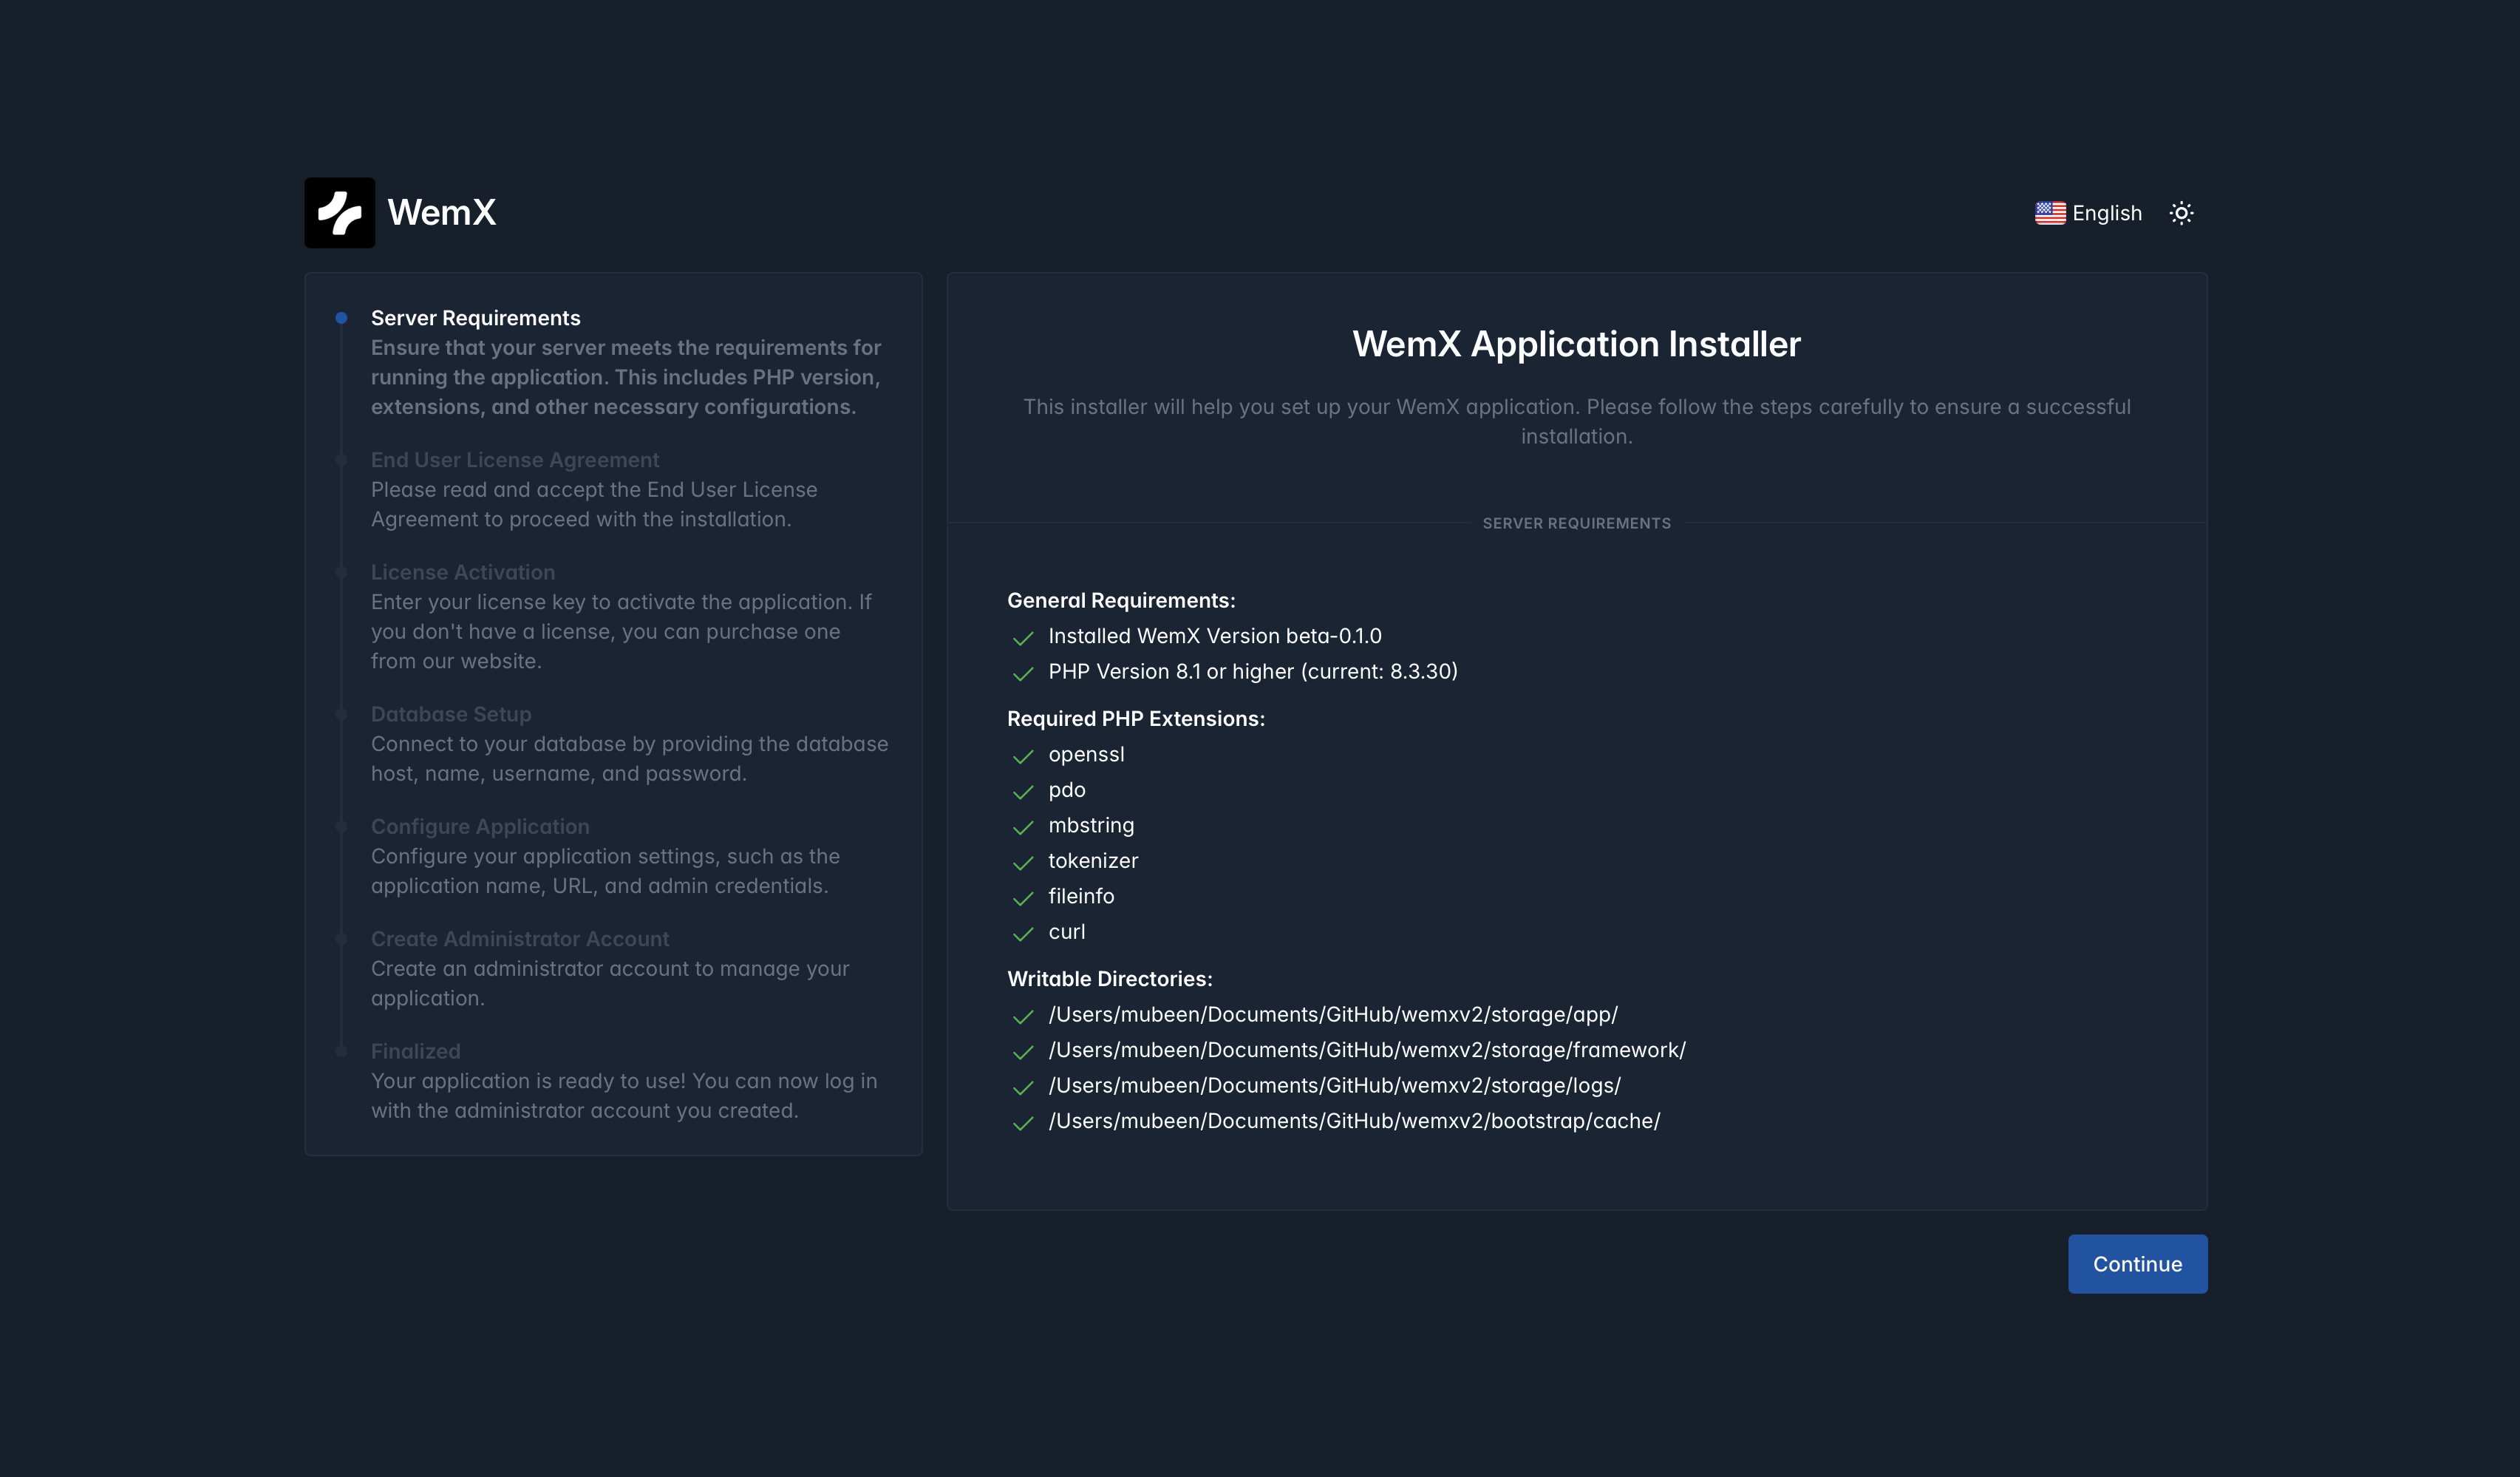
Requirements
Your server must at least have the following requirements in order to run WemX. Select Automatic Install to automatically install the correct dependencies.
| Table | Description |
|---|---|
| PHP version | 8.3 or above |
| Composer | Required for installing and updating PHP dependencies |
| Database | MySQL 8+, MariaDB 10.3+, or PostgreSQL |
| Web server | Nginx, Apache, or Caddy (HTTPS recommended in production) |
Installation
Choose how you want to install WemX. Switch between the official installer and a self-managed Linux setup; the manual path links to the full guide.
This software requires a license key, get your free license key here: https://app.wemx.net
If you have WemX v2 installed in /var/www/wemx, we recommend moving it to /var/www/wemxv2 so that v3 can be installed in /var/wemx/wemx
This installs PHP 8.3, Composer, and related dependencies, clones WemX from GitHub, and applies a sensible web server configuration so you can finish setup in the browser.
bash (curl -s https://sh.wemx.net/install.sh)Your server must have the minimum requirements before proceeding with manual installation.
Create the WemX project directory and move into it
mkdir -p /var/www/wemx
cd /var/www/wemx
Download the latest WemX release, extract it, and move the project files into /var/www/wemx. The zip contains a wemx/ folder with artisan, public, storage, and the rest of the app.
curl -Lo wemx.zip https://github.com/wemxnet/wemx/releases/download/v3-beta-0.1.0/WemX-v3-beta-0.1.0.zip
unzip wemx.zip
rm wemx.zip
chmod -R 755 storage/* bootstrap/cache/
Now we create a new .env file and generate a new encryption key
Do not run the commands below if you already have a .env file and encryption key in APP_KEY
# Create a new .env file
cp .env.example .env

# Generate a new encryption key
php artisan key:generate
The encryption key is used to encrypt certain data that is stored inside the database. Make sure to backup this key and keep it somewhere secure.
Now we setup the schedular by adding it to cronjobs
# Run in the CLI and select (1) if it asks
sudo crontab -e
A file should open up, scroll to the bottom of the file and paste in the following
* * * * * php /var/www/wemx/artisan schedule:run >> /dev/null 2>&1Configure a queue worker service
# Create a new file for the queue worker service
nano /etc/systemd/system/wemx.service
A file should open up, paste in the following
[Unit]
Description=WemX Queue Worker

[Service]
# On some systems the user and group might be different.
# Some systems use `apache` or `nginx` as the user and group.
User=www-data
Group=www-data
Restart=always
ExecStart=/usr/bin/php /var/www/wemx/artisan queue:work
StartLimitInterval=180
StartLimitBurst=30
RestartSec=5s

[Install]
WantedBy=multi-user.target
You can now setup a webserver such as Nginx and point it to /var/www/wemx/public, afterwards continue with the web installer as documented below
After the server-side setup finishes and your web server is serving WemX, open your site in a browser. The web installation interface continues setup in the UI—environment checks, database connection, admin user, and license activation.
Configure database connection to WemX in web interface
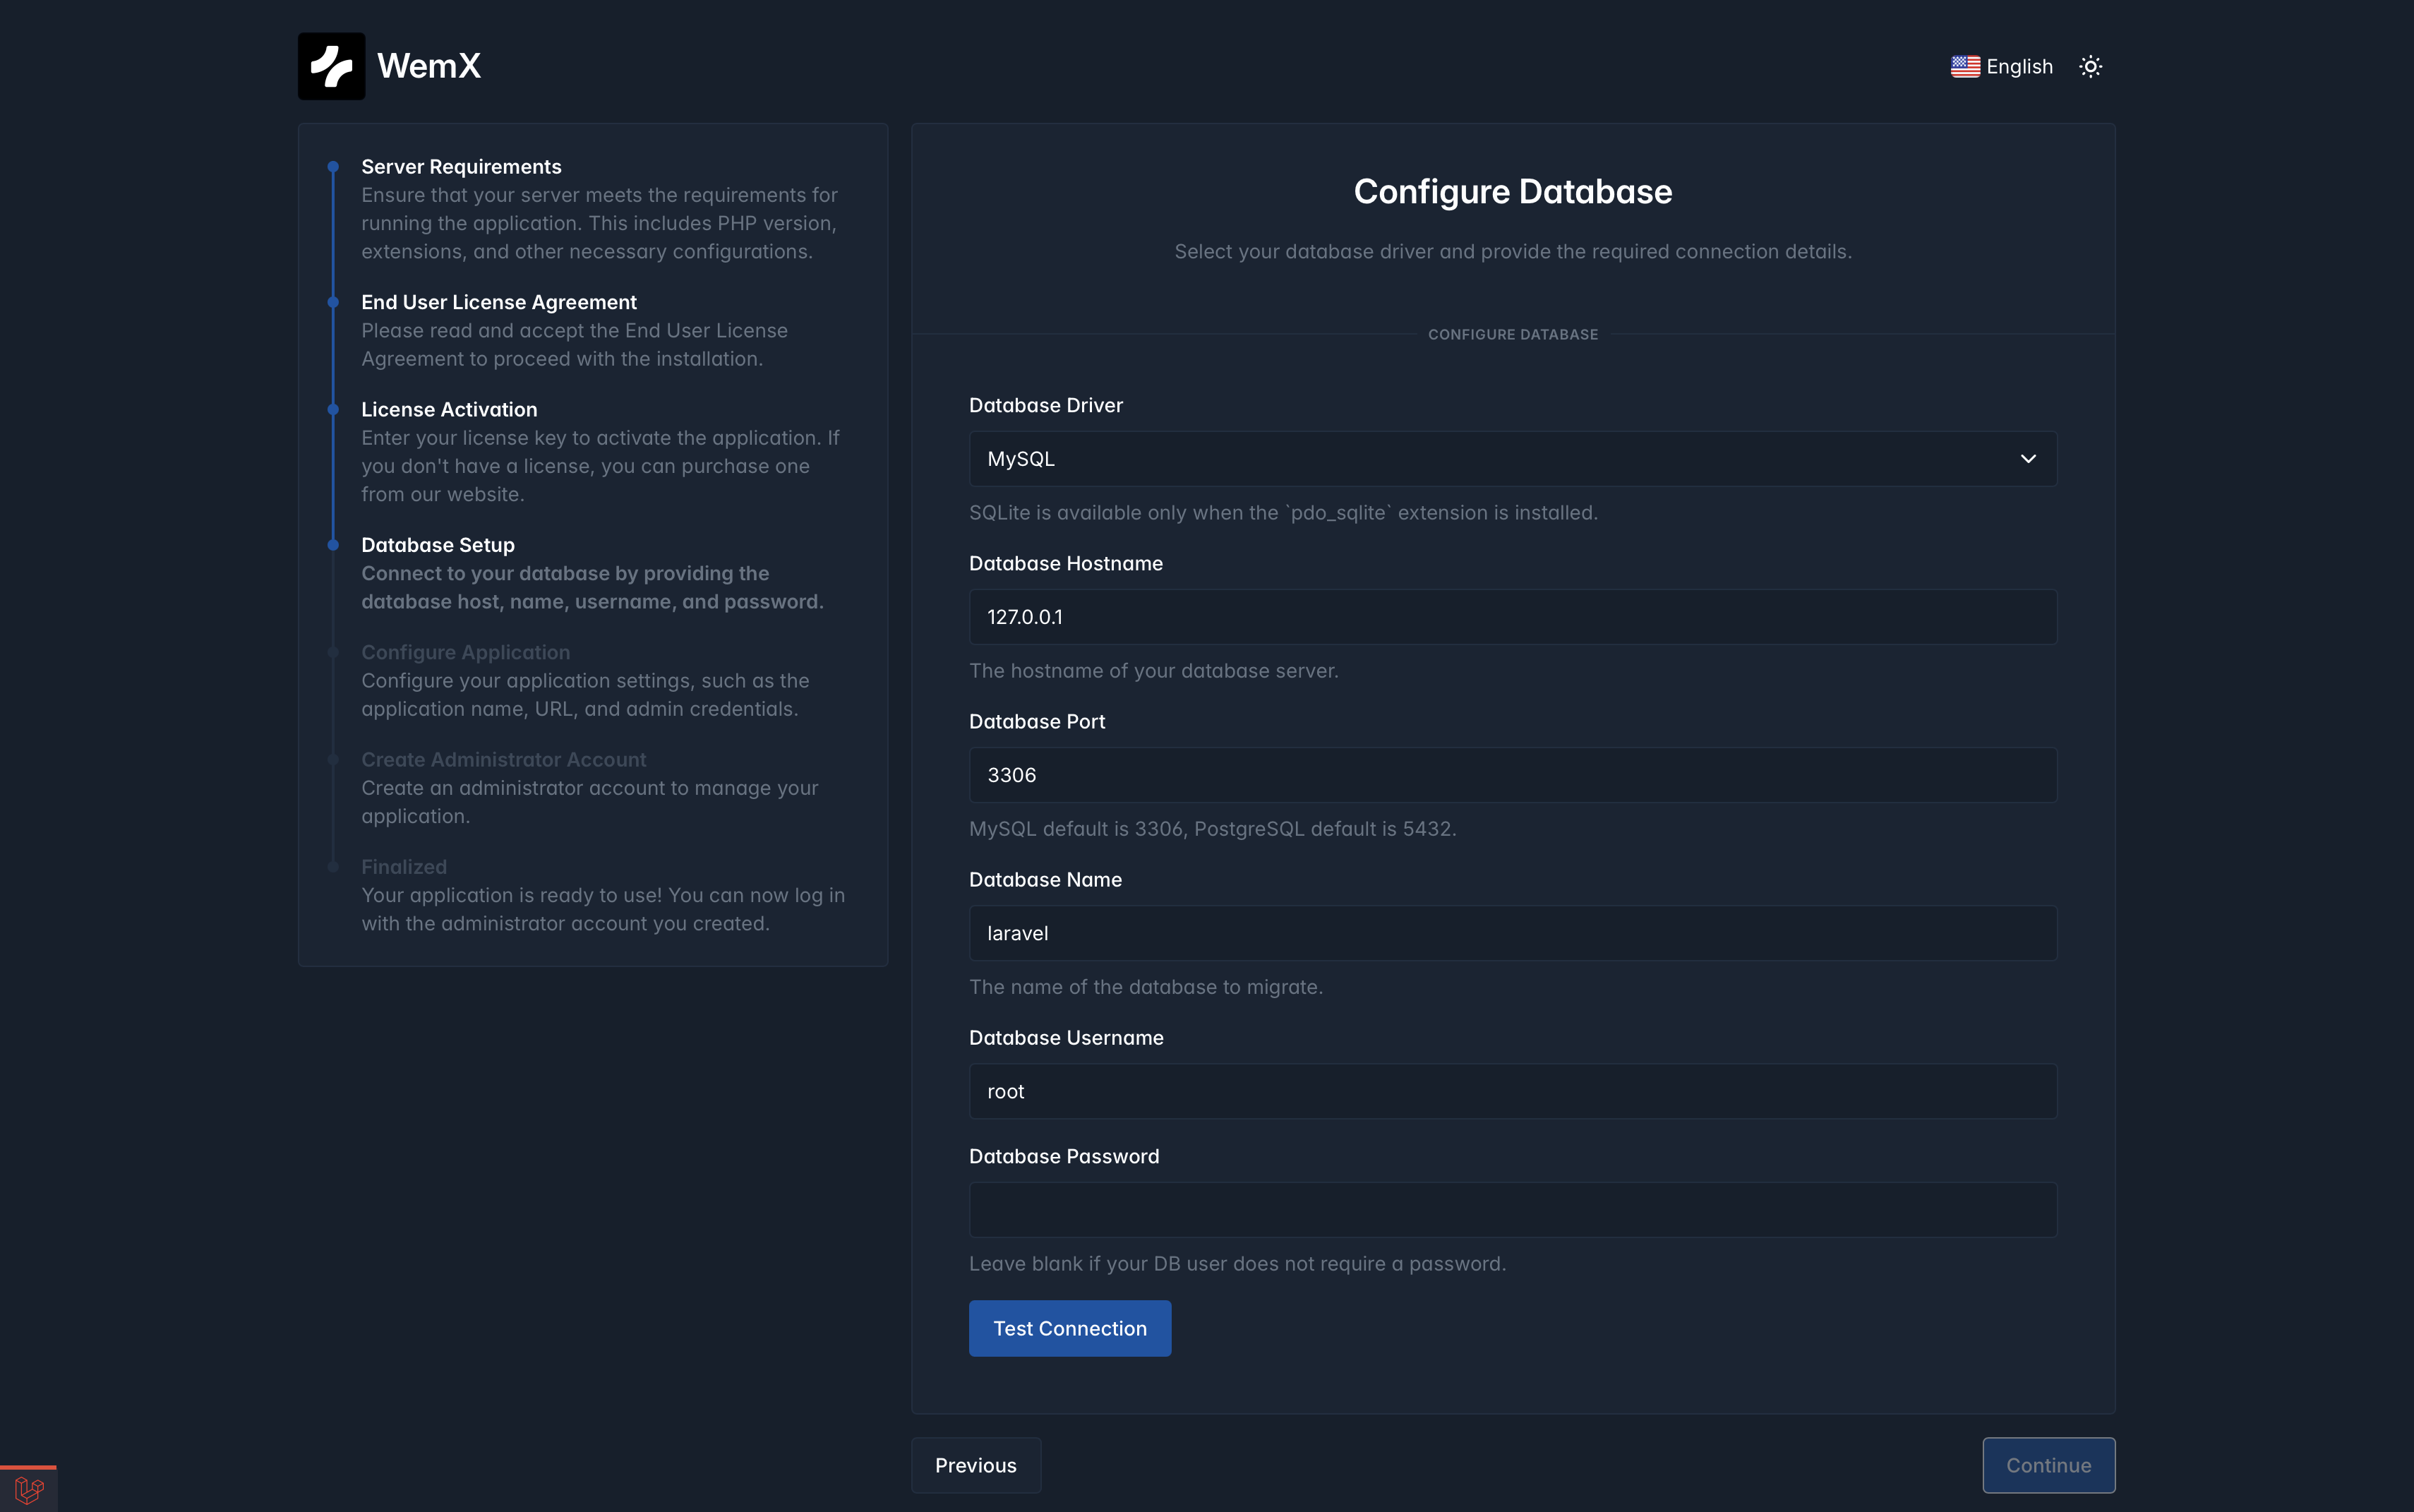
Out of the box, WemX supports the following database types, and they can be configured directly in the web installer interface:
Great option for smaller apps & development
Choose SQLite in the web interface and provide the path for database file (default path recommended).
To understand file path and permissions for SQLite on Laravel, see: Laravel SQLite Configuration
Choose MySQL in the web interface.
If you are running MySQL on Linux, you can create the database and user with:
# Ubuntu/Debian
sudo apt update && sudo apt install -y mysql-server
sudo systemctl enable --now mysql
Open MySQL CLI
sudo mysqlThen run this inside the MySQL prompt, replace password with your actual password
CREATE DATABASE wemx CHARACTER SET utf8mb4 COLLATE utf8mb4_unicode_ci;
CREATE USER 'wemx_user'@'127.0.0.1' IDENTIFIED BY 'your_strong_password';
GRANT ALL PRIVILEGES ON wemx.* TO 'wemx_user'@'127.0.0.1';
FLUSH PRIVILEGES;
EXIT;
Use these values in the web installer:
- Host:
127.0.0.1 - Port:
3306 - Database:
wemx - Username:
wemx_user - Password: the password you set above
Retrieve your connection values (host, port, database name, username, password) from:
- your server/database panel (cPanel, Plesk, cloud provider, etc), or
- your database administrator if this is managed internally.
Useful references: MySQL 8.0 Manual
Choose Postgres in the web interface.
If you are running PostgreSQL on Linux, you can create the database and user with:
# Ubuntu/Debian
sudo apt update && sudo apt install -y postgresql postgresql-contrib
sudo systemctl enable --now postgresql
Open PostgreSQL CLI
sudo -u postgres psqlThen run this inside the PostgreSQL prompt, replace password with your actual password
CREATE DATABASE wemx;
CREATE USER wemx_user WITH ENCRYPTED PASSWORD 'your_strong_password';
GRANT ALL PRIVILEGES ON DATABASE wemx TO wemx_user;
\q
Use these values in the web installer:
- Host:
127.0.0.1 - Port:
5432 - Database:
wemx - Username:
wemx_user - Password: the password you set above
Retrieve your connection values (host, port, database name, username, password) from your PostgreSQL hosting dashboard or infrastructure team.
Useful references: PostgreSQL Documentation
Choose Postgres By URL in the web interface if your provider gives a single connection string (for example Supabase, Neon, Railway, Render).
Create your database/project in the provider dashboard, then copy the full PostgreSQL connection URL from provider settings.
Provider docs:
If you use another supported Laravel database driver, you can configure it manually in .env instead of the web form.
Create the database and credentials with your provider/admin first, then configure them according to Laravel docs: Laravel Database Configuration
After this go back to the web installer, if the connection details are valid, the web installer will show the new connection.
The web installer writes these values to your .env automatically after you submit the form.
🚀 WemX has been installed successfully